What is a granny square?
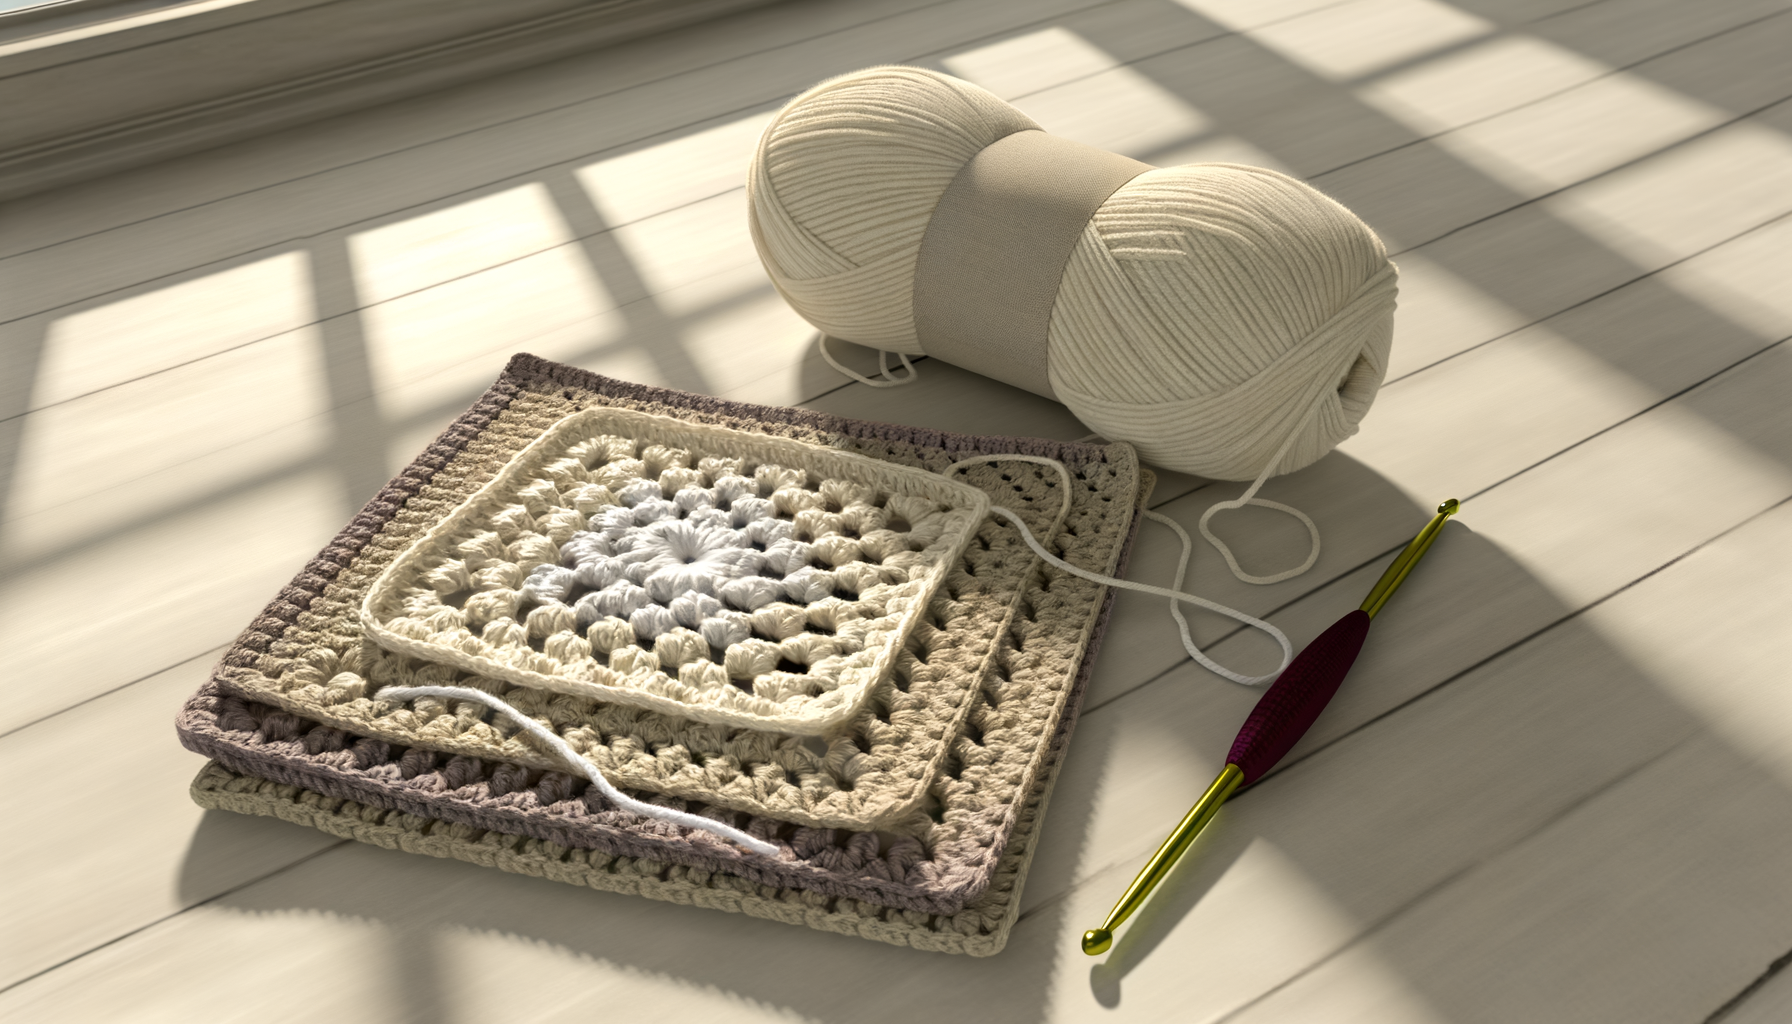
The classic granny square is crochet's most recognisable motif. A small square made from clusters of double crochet worked in rounds, separated by chain-2 corner spaces. Each round gets slightly bigger, creating the square shape naturally. The iconic look — concentric square rings in different colours — has been popular since the Victorian era and has had repeated TikTok-era revivals.
Granny squares are often a beginner's first project worked 'in the round' (working in a continuous loop rather than back and forth in rows). They teach three important skills in one small piece: working stitches into a chain space (not into a stitch), turning corners with chain spaces, and joining a round with a slip stitch.
Once you can make one granny square, you can make any number of them — and they join together into blankets, cardigans, cushions, bags and market totes. The granny square is crochet's most versatile building block.
What you'll need
A 5mm crochet hook (we use the Clover Amour for its ergonomic handle; full kit breakdown on our crochet starter kit page), DK yarn in 1–4 colours (classic granny squares use 3–4 coordinating colours; Paintbox Simply DK is our go-to at around £2.80 per ball), scissors and a tapestry needle for weaving in ends.
Prerequisite: comfort with chain stitch, slip stitch and how to double crochet. If any of those feel wobbly, practise them on a flat swatch before tackling your first granny square.
For a classic 3-round granny square using a different colour on each round, you'll end up with lots of short yarn ends to weave in. If you're new to weaving in ends, stick to one colour for your first few squares.
How to crochet a granny square — step by step
Step 1 (starting ring). Chain 4. Join the chain into a ring with a slip stitch: insert your hook into the first chain you made, yarn over, pull through both the chain and the loop on your hook. You now have a small ring of 4 chains.
Step 2 (round 1 start). Chain 3. This chain-3 counts as your first double crochet.
Step 3 (first cluster). Work 2 double crochets into the ring. (Insert your hook into the centre of the ring, not into a chain stitch.) You now have 3 double crochets in the ring, counting the chain-3 as one. This is your first cluster.
Step 4 (first corner). Chain 2. This chain-2 forms the first corner space.
Step 5 (second cluster). Work 3 double crochets into the ring.
Step 6. Chain 2 (second corner space).
Step 7. Work 3 double crochets into the ring.
Step 8. Chain 2 (third corner space).
Step 9. Work 3 double crochets into the ring.
Step 10. Chain 2 (fourth corner space).
Step 11. Join to the top of the starting chain-3 with a slip stitch. You now have round 1 complete: 4 clusters of 3 double crochets, separated by 4 chain-2 corner spaces. Congratulations — you have a tiny square.
Step 12 (round 2). Slip stitch across to the first chain-2 corner space. (Or, if changing colours, cut the yarn, weave in the end, and start round 2 in a new colour by making a slip knot in the first corner space.)
Step 13. Chain 3 (counts as first dc). Work 2 more dc into the same corner space. Chain 2. Work 3 dc into the same corner space. This creates the first new corner for round 2.
Step 14. Chain 1. (This creates a small 'side' space between clusters.) Work 3 dc + chain 2 + 3 dc into the next chain-2 corner space. This is another new corner.
Step 15. Repeat around: chain 1, then work '3 dc + chain 2 + 3 dc' into each corner space. You should end with a chain 1 before slip-stitching into the top of the starting chain-3.
Step 16 (round 3). Slip stitch into the next corner space. Chain 3 (counts as first dc). Work 2 more dc + chain 2 + 3 dc into the corner. Chain 1. Work 3 dc into the next chain-1 side space. Chain 1. Work 3 dc + chain 2 + 3 dc into the next corner. Continue around.
Step 17. After round 3, join with a slip stitch, cut the yarn with a 15 cm tail, pull the tail through the last loop, and weave the end in with a tapestry needle.
You've finished a 3-round granny square. Three rounds makes a square roughly 10 cm wide in DK yarn — a good 'starter' size. Larger squares are made by adding more rounds: each round adds another cluster of 3 dc between corners on each side.
Common granny square mistakes (and quick fixes)
Working into stitches instead of spaces. Granny square clusters are worked INTO the chain-2 and chain-1 spaces between stitches, not into the double crochets themselves. This is the #1 beginner confusion. The easiest way to stay right: insert your hook UNDER the chain-2, not into it.
Forgetting the corners. Each corner has two clusters of 3 dc with a chain-2 between them — this is what creates the turn from one side of the square to the next. If your 'square' is coming out rounded or wavy, you've probably missed a corner or put clusters in a wrong spot.
Skipping the slip-stitch 'travel' between rounds. At the end of round 1, you need to slip-stitch across the top of the row to reach a corner space before you can start round 2. If you chain 3 and start working immediately, you'll start in the middle of a cluster rather than at a corner — the whole square skews.
Ending up with a hexagon instead of a square. Means you've accidentally added an extra cluster somewhere — usually because you worked clusters into two chain-1 side spaces back to back instead of adding a corner between them. Count clusters per side: each side should have exactly one more cluster than the last round.
Yarn ends fraying before you weave them in. Leave generous 15 cm tails when cutting the yarn. Short tails are impossible to weave in properly.
Colour variations and design ideas
Classic four-colour granny. Each round is a different colour — traditionally a neutral background (cream or grey) with three accent colours inside. Produces the 'stained glass' look most people picture when they think of granny squares.
Two-colour granny. Alternate two colours round-to-round for a graphic, modern feel. Or use one colour for the first two rounds and a contrast for the outer round.
Solid granny. Same colour throughout. A good option for a calm, modern look and avoids end-weaving. Classic for cardigans and cushions.
Colour-matched sets. Make a dozen granny squares where each one uses a different colour combination from a 'palette' of 5–6 coordinating yarns. Great for patchwork blankets.
What to do with finished granny squares
A single granny square makes a coaster. Two dozen joined together make a cushion cover. Forty-eight make a baby blanket. Two hundred make a full-size throw. Granny squares scale endlessly — which is why they're the most versatile crochet motif.
Joining options: sew with a tapestry needle (classic, slightly time-consuming), slip-stitch join as you go (faster, slightly visible seam), single-crochet join (strong, creates a visible ridge between squares).
Granny-square projects worth trying: a granny-square cushion cover (see our best crochet projects for gifts for the Attic24 Bloom Cushion pattern), a granny-square cardigan (a popular beginner garment because no shaping is required — just join squares into a rectangle), a granny-square bag, or a simple throw blanket (see our how to crochet a blanket guide).
What to learn after granny squares
Granny squares give you working-in-the-round confidence without the complexity of a magic ring. Natural next steps: how to crochet a magic ring (replaces the chain-4 ring with a tighter, neater centre — essential for amigurumi and many hat patterns), how to change colour in crochet (for multicoloured granny squares without cutting yarn each round), and simple hats worked in the round (how to crochet a beanie).
Granny stitch variations — 'solid granny' (no chain-1 side spaces), 'mitred granny' (worked diagonally), 'granny stripes' (granny clusters worked in rows instead of rounds) — are all easy once the classic granny is automatic.